

Creative Commons Image Attribution
Think of your WordPress web site as a (relatively disorganized) drawer in your garage. In serving up a website, a browser and server work together to organize the contents of that drawer according to what a user wants to see. Each page has potentially dozens of resources associated with it, from tracking scripts to images to CSS files to php scripts. Each time a new resource is needed, it’s as though your web server is having to open the drawer, root around inside for the resource, and close the drawer.
Depending on the size of the resource and the bandwidth it takes to deliver it, you are often looking at “opening and closing the drawer” hundreds of times for even one page. Multiply that type of action with even a modest bump in traffic, and it’s easy to see why your $3/month hosting package crumples under the weight of your WordPress site.
What makes a WordPress site so great (usability, simplicity for even the most novice end user, etc) is precisely what makes it such a generally sluggish website platform, especially over time.
But that doesn’t have to be true, with the right planning and optimizing.
Our goal in optimizing the site is to take as many resources as you can and put them elsewhere. Think of it like an embedded YouTube video. Though it is appearing on your site, all of the bandwidth (the “opening and closing of the drawer”) is on YouTube’s side. The process I’ll outline below takes almost everything on your site and houses it on Amazon’s server, making Amazon open and close all those drawers for you. Your WordPress install will hum like the first day you read the words “Hello World!”
Amazon’s storage service is called Simple Storage Service, or S3 for short. Though not a true Content Delivery Network, it will act as one, serving content to users without taxing your server.
First off, this process does cost money. You have to have a card on file with Amazon to even sign up for the service. But, behold the costs I accumulated 14 days into my February billing cycle:
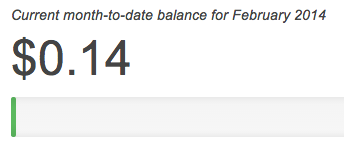
Also note that I host my church’s podcast and their web files on my personal Amazon account. Come to think of it, there are about 4 different domains using my S3 resources.
If a faster website is worth a couple of pennies every month, then read on.
The first thing to do is sign up for an Amazon Web Services account (Not an affiliate link)
After you’ve set up the account, return to your WordPress Dashboard and install/activate two plugins: Amazon Web Services and Amazon S3 and Cloudfront These two plugins will automatically upload any new media files (like when you add a picture or an audio file to a post) to Amazon.
A new link named “AWS” will appear in your dashboard’s left column, toward the bottom.
Only a couple more technical steps to get things up and running. Bear with me, here.
Create a new IAM user in the IAM section of your Amazon Web Services Console and copy/paste the Secret Access Key and Access Key ID to a blank text editor file.
Then, using an FTP program (I use Cyberduck on a mac) open the file wp-config.php (located in the root of your WordPress install) and add the following two lines (replace the stars with your copied keys):
define( 'AWS_ACCESS_KEY_ID', '********************' );

define( 'AWS_SECRET_ACCESS_KEY', '****************************************' );
Save that file back to the server.
Now, click the “AWS” link in your WordPress dashboard, and the “S3 and CloudFront” link that drops down.
On that settings page, you’ll need to name a new bucket. S3 bucket names have to be unique (in the whole world) so I recommend going with your URL. It’ll also make it easy should you decide to create 35 websites and host all of their content on S3, for like 45 cents a month.
You can ignore the CloudFront settings, and here’s how I have ticked the boxes on my setup:
Once that is saved, you are all set going forward. New images and other media that are uploaded to the site will be placed into Amazon’s capable hands for delivery to your readers.
If your website is new, you’re all set. But if like me you have years of blogging behind you and megabytes (or gigabytes) of images and other files in the /wp-uploads directory alone the fix above only slows the bleeding of server resources. I’m still researching the best ways to modify existing links. I found a plugin that is doing it for me, but I’m not very comfortable with how it’s doing it, leaving me open to some security risks.
Do you know of a fix? let me know in the comments!